

How To Install Mop Boards
Baseboard Installation at a Glance
- Tools & equipment: Angle ruler, record measure, miter saw, nail gun, spackle, caulk, trim
- Step 1: Measure room
- Step 2: Cutting trim
- Step 3: Cutting and add together returns
- Step iv: Nail pieces to wall
- Stride 5: Spackle nail holes
- Stride 6: Caulk gaps
- Step 7: Pigment
Baseboards make a room await complete. They're more but an aesthetic feature; they also embrace the joints between the floors and walls. Baseboards are a lot similar crown molding, but they tend to be less elaborate design-wise — they are placed well below your line of sight, afterwards all.
This May As well Interest You: How Much Does It Cost to Install Crown Molding?
Calculation or replacing baseboards is a elementary plenty DIY chore, so long as you lot have a miter saw at your disposal. While the installation process for baseboards isn't difficult, the most challenging role is measuring and cutting the trim at the correct angles.
Types of Baseboards
Before buying the trim, yous should consider several different styles and materials based on the walls and floors of your home. Some of the most commonly used materials for baseboards are PVC, hardwood and vinyl. A few of the diverse styles are flat, stepped, sculpted mid-acme and taller sculpted baseboards. Each of these provides a different expect, so choose the one that is best suited for the room information technology's placed in.
Tools Needed
While the installation process isn't complicated, you will demand specific tools to do the task correctly and efficiently. As always, take precautions while working. Safety should be a tiptop priority whenever doing any DIY project. Make sure to vesture safety glasses and gloves, particularly while operating the saw.
To install baseboards, you'll need:
- Angle ruler
- Tape measure
- Miter saw
- Nail gun
- Spackle
- Caulk gun
- CA Mucilage
- Trim (baseboards)
How to Install Baseboards
Follow these 7 baseboard installation steps:
1. Mensurate Twice...
Before you lot even buy the fabric, you need to know how much you volition need. Advisedly mensurate the dimensions of the room you plan to install baseboards in it. As the quondam adage goes, you should ever measure twice to foreclose any mistakes when it comes time to cut. Once you've measured the space, you're prepare to buy the material. You should purchase extra in case you brand any mistakes while cutting the pieces. Yous can find baseboards at your local hardware shop, big-box store or online.
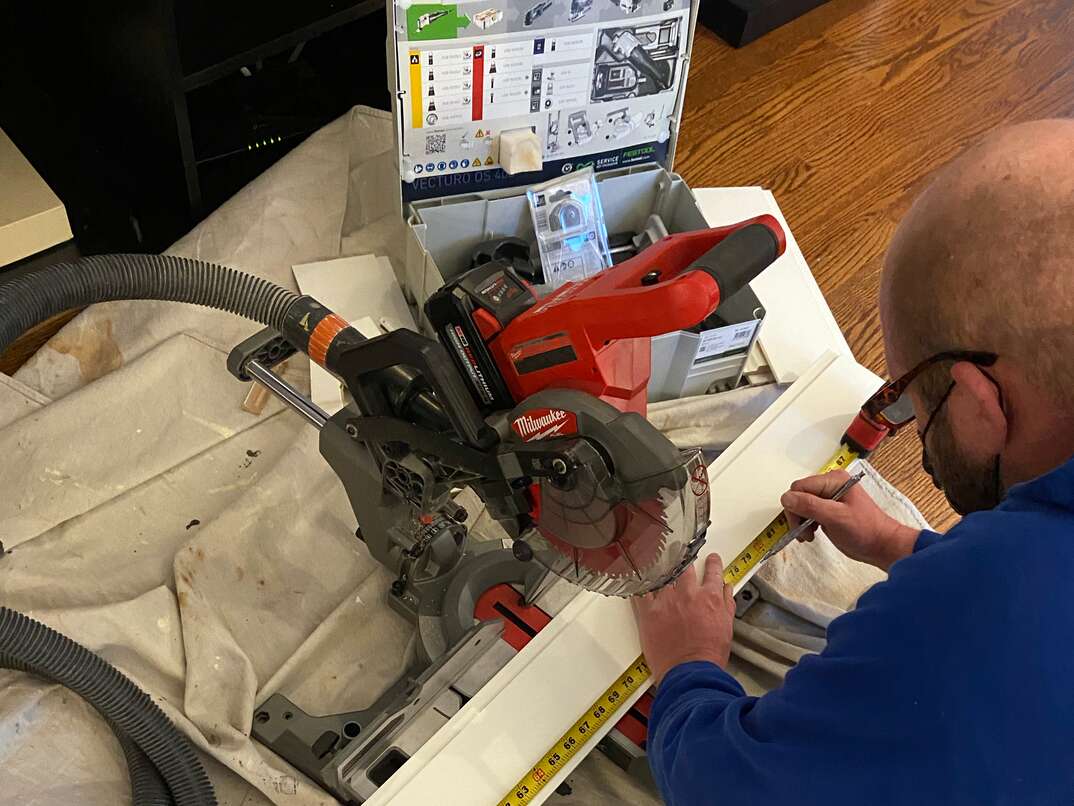
2. ...Cut Once
At this signal, y'all should use your angle ruler to measure the angles of the corners. In theory, corner angles should be ninety degrees, just that's not always the case in practice. Similarly, if your trim runs into the door, the point where information technology meets may not exist a straight xc-degree angle. For odd angles, Nassrin'south DIY recommends using an angle ruler. Measure the corner, then place it against the baseboard and mark the spot. You tin later utilise this mark to cut information technology using the miter saw. By measuring and cutting trim at precise angles, you'll get a much cleaner installation. If you don't accept an angle ruler, information technology's fine to assume the angle is 90 degrees.
For within corners, y'all'll want to cut the two pieces of trim at 45-caste angles. According to woodworker Wes Hamstra'due south tutorial, place the trim on your saw table and cut it at a 45-caste bending. Cut the 2nd piece of trim at a 45-caste bending on the side where it will see the first piece. If you have to make a cut where the trim meets the door, you lot can either practice a straight cutting or cutting at an odd angle, depending on how they see.
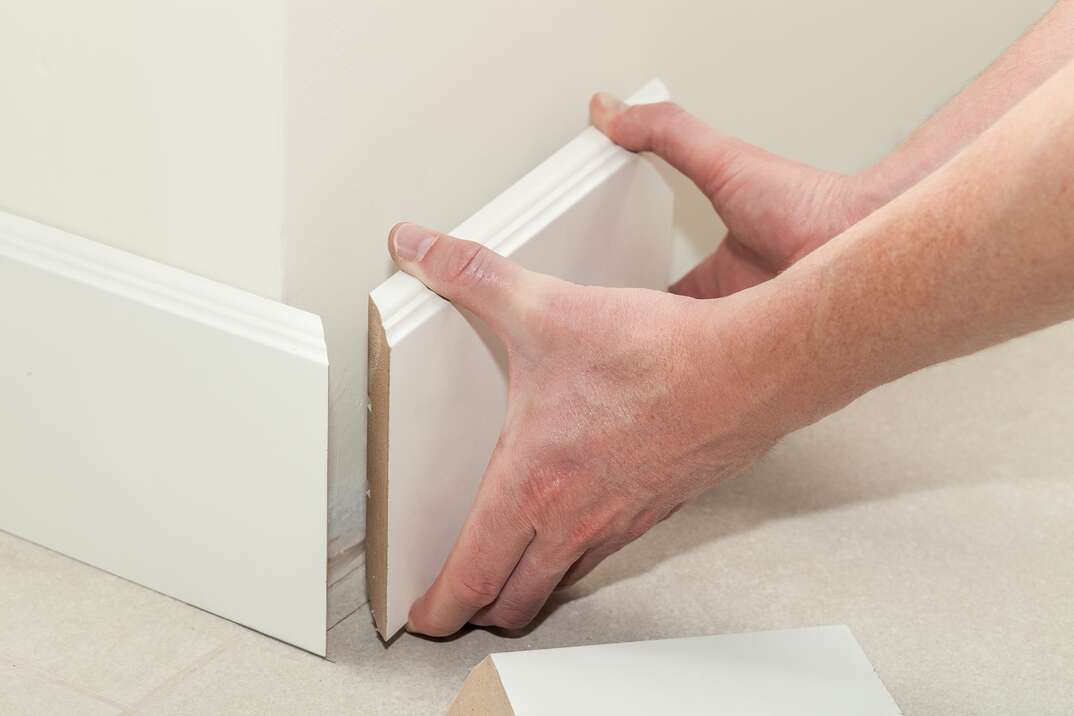
3. Cut the Corners
Information technology might be tempting to leave the sides of the outside corner pieces the style you cut them and but paint them to friction match. However, for appearance'southward sake, it'due south worthwhile to cover the raw border with what is chosen a "return." To make a render, but cut off a small piece of the trim at a 45-caste angle. So, utilise CA glue to glue information technology onto the stop of the larger piece of trim facing the other direction.
More Related Articles:
- What Is Wainscoting?
- How Much Does Drywall Cost?
- How to Hang Drywall: A vii-Stride Overview
- Ensure Your Shiplap Walls Are Shipshape With This Footstep-past-Step Installation Guide
- How to Fix a Hole in the Wall like a Pro
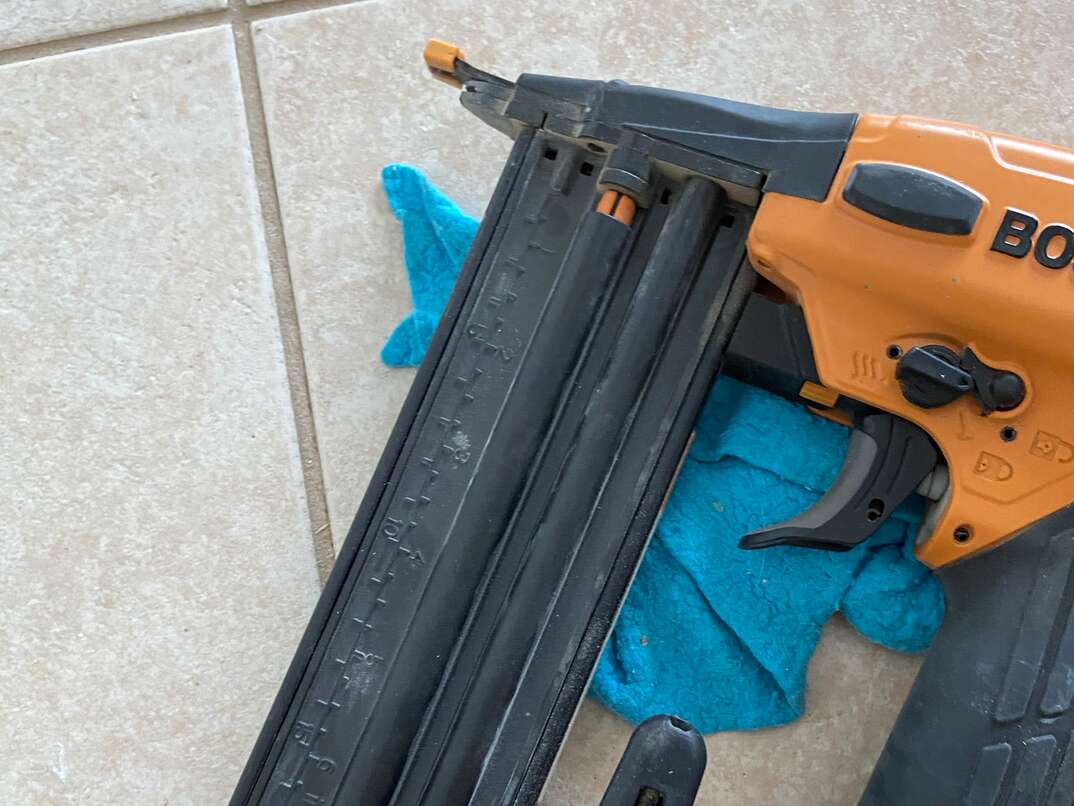
4. Nail in Place
Subsequently the baseboards are all cut, it'due south fourth dimension to smash them. A nail gun is the best tool to utilize for this; a hammer can harm the trim if you lot're non careful. Place the baseboards against the wall and add nails to the bottom and pinnacle portion of the baseboard. Each nail should be spaced out about sixteen inches. Employ a stud finder to find where to offset nailing the meridian portion, and then put a boom every sixteen inches in either direction from there. Do the aforementioned for the bottom of the trim.
5. Spackle the Nail Holes
After you have nailed the baseboards to the wall, yous'll probably notice a lot of boom holes. Spackle is the all-time fabric to utilize to fill them. Other materials shrink with time, so in that location volition exist noticeable dents in your baseboards when yous paint them. Utilise a spackle pocketknife to apply the spackle and go far level. You tin also utilize your finger to add the spackle to the holes.
half-dozen. Caulk Gaps
Use caulk to make full any gaps and small cracks. Add together caulk across the meridian of the trim and in any gaps you find in betwixt. Smoothen and flatten the caulk using your finger or knife to give it a sharper await.
7. Paint
Depending on the type of trim y'all bought, you might want to paint information technology after you install it. Painting the trim isn't complex, but you should be cautious in order to get a professional look. Some baseboards come pre-primed, so figure out whether you lot will demand to prime your trim earlier painting it. You should also research what blazon of paint works best on the blazon of baseboards you bought.
You volition first need to wait for the caulk to dry. Depending on the type you purchase, this tin can take xxx minutes to an 60 minutes or more than. Once it's dry, add together painter's record to the flooring and the wall to avoid getting paint everywhere. Paint across the trim using long strokes.
Since we're all home at present more than than always, being prepared for unexpected dwelling house repairs with a plan from HomeServe is of import. Having a plan in place gives you peace of heed knowing that y'all can simply call our 24/7 repair hotline for covered breakdowns. See what plans are available in your neighborhood.

Source: https://www.homeserve.com/en-us/blog/how-to/baseboard-installation/
Posted by: loweinquen.blogspot.com
0 Response to "How To Install Mop Boards"
Post a Comment